How To Create Custom iPhone Ringtones Using iTunes on a Windows PC
Anyone who has owned an iPhone for any period of time knows that most, if not all things have to be done a very specific way – “the Apple way”; ringtones are no exception.
Creating custom ringtones and placing them on an iPhone is not quite as simple as it is for Android, but we’re sure going to do our best to simplify the process as much as possible with this guide.
- Step 1 – Locate the Audio Clip You Want to Use
- Step 2 – Import the Audio Clip Into iTunes
- Step 3 – Adjust the Start & Stop Times of the Audio Clip
- Step 4 – Convert the Clip to AAC Format.
- Step 5 – Locate the AAC Version of the Clip and Rename the Extension to .m4r
- Step 6 – Unhide File Extensions in Windows File Explorer
- Step 7 – Copy the Ringtone to Your iPhone
- Step 8 – Set the Ringtone on Your iPhone
Step 1 – Locate the Audio Clip You Want to Use
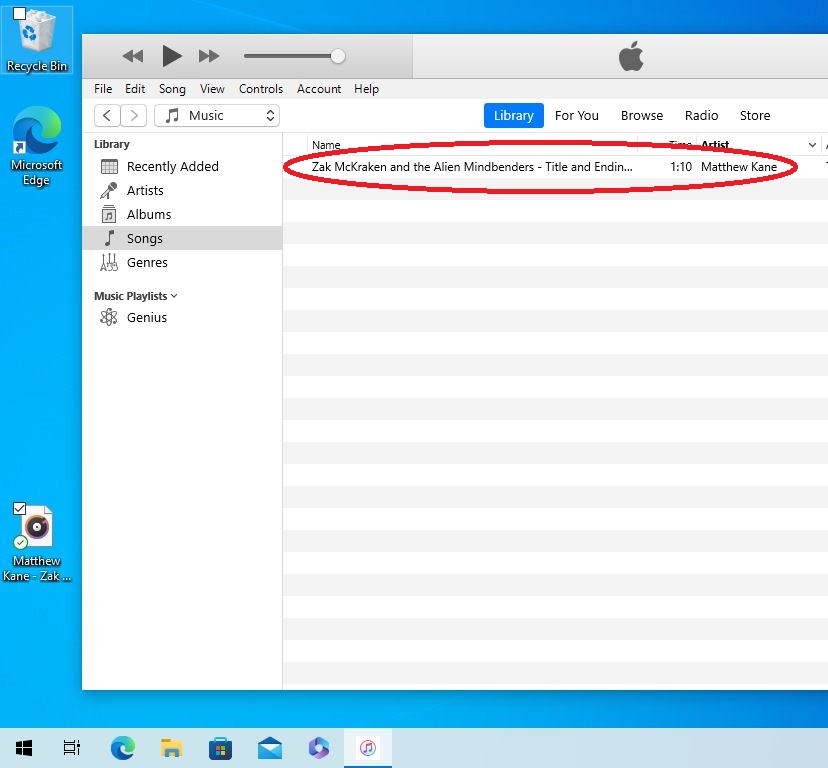
Locate the media you would like to use for your ringtone. In this example, the audio clip is located on the Windows desktop.

Step 2 – Import the Audio Clip Into iTunes
Open iTunes. If not installed, download it here:: iTunes Download
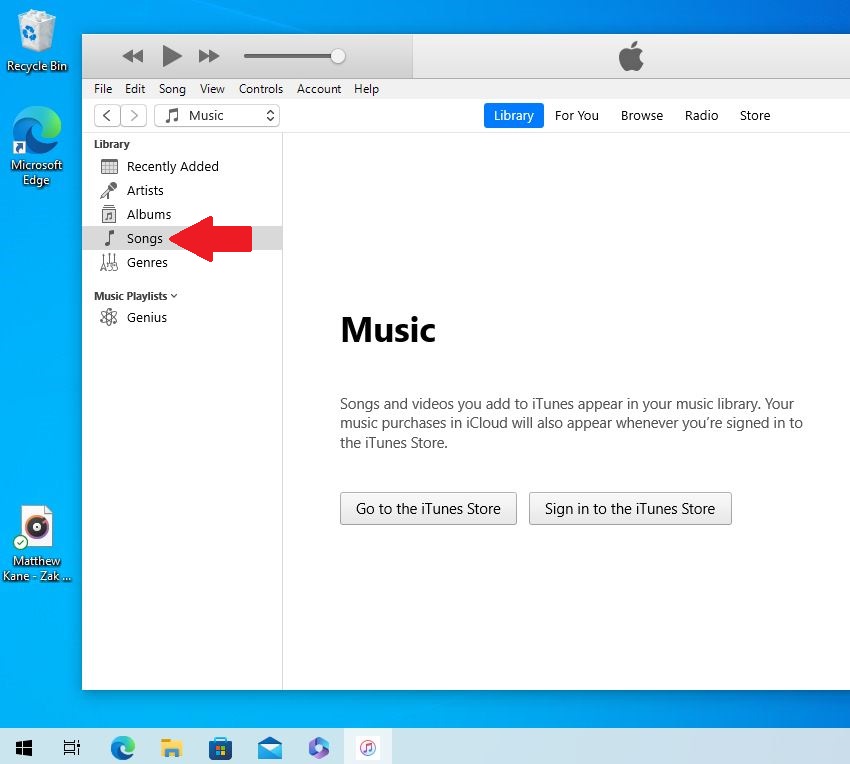
Once iTunes is open, select ‘Songs’ from the left-hand pane under ‘Library.’
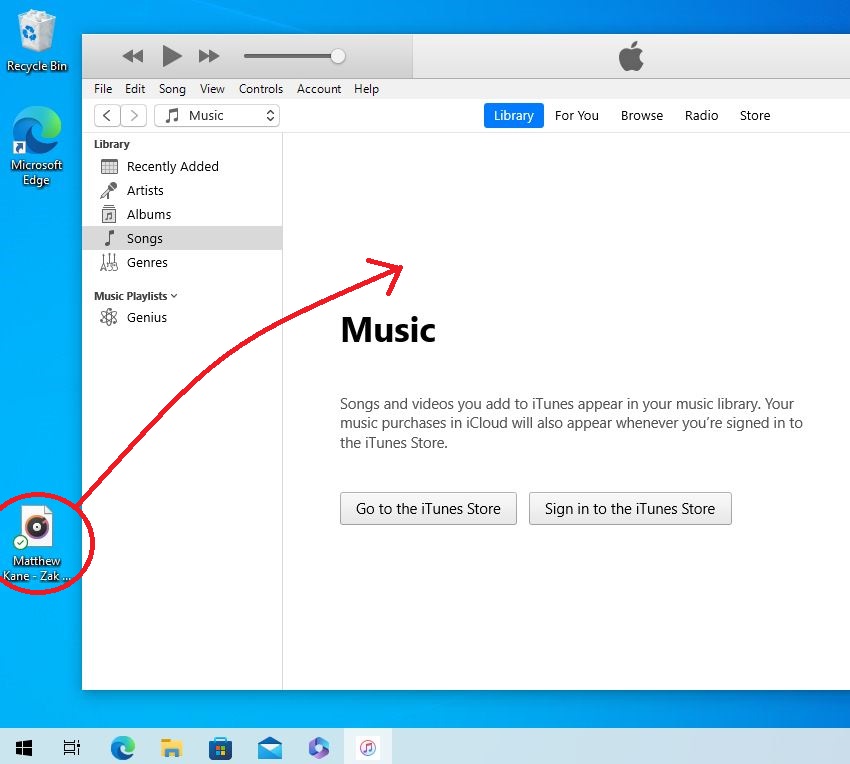
Drag the audio clip into iTunes.
Step 3 – Adjust the Start & Stop Times of the Audio Clip
Right-click the newly placed audio clip in iTunes to open a context menu. Then, choose ‘Song Info.
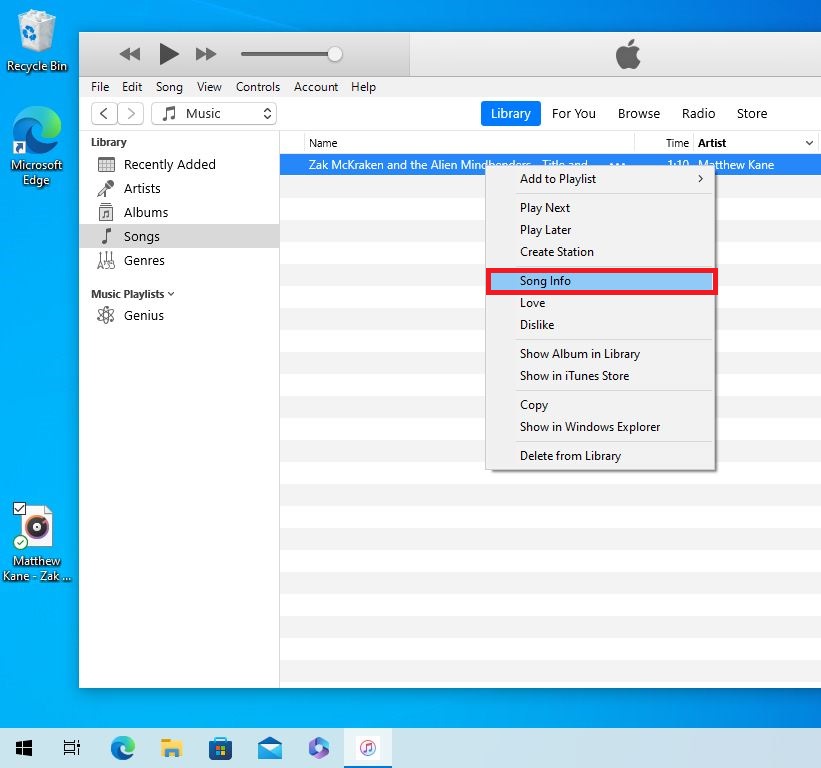
Next, click on ‘Options’ in the menu.
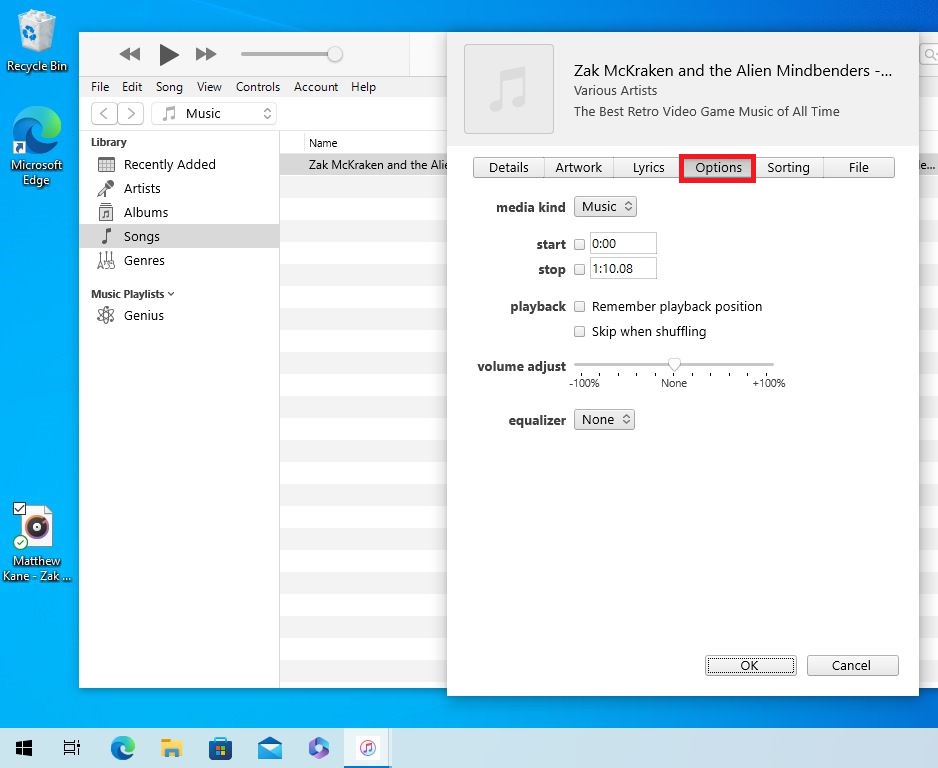
At this point, you need to select the portion of the clip that will be used for the ringtone. Keep in mind that the default ring time on the iPhone is 20 seconds
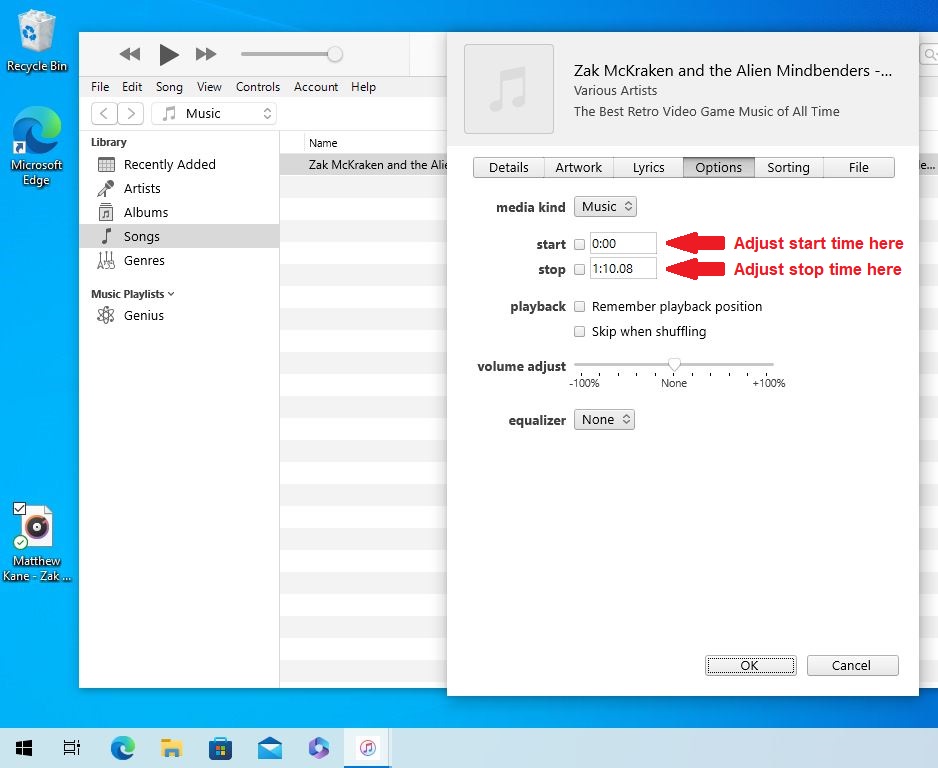
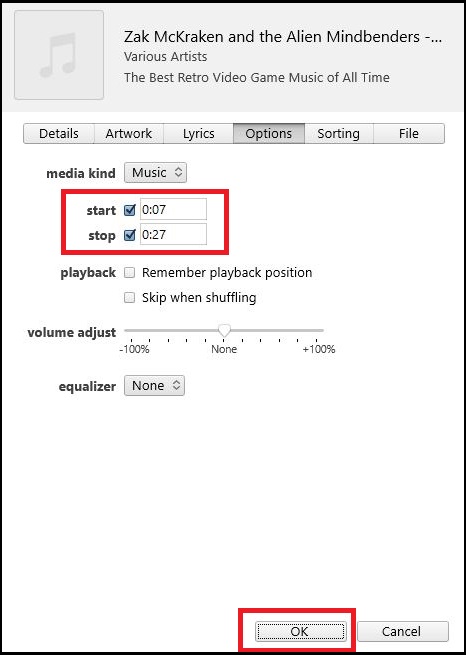
In this example, the clip will start at 0:07 seconds and end at 0:27. Also, remember to check the start and stop boxes. Once you’re done, click OK.
Step 4 – Convert the Clip to AAC Format.
With the clip selected in iTunes, click on ‘File,’ then go to ‘Convert,’ and finally choose ‘Create AAC Version.

Step 5 – Locate the AAC Version of the Clip and Rename the Extension to .m4r
Once the AAC conversion is complete, you need to find the file in Windows File Explorer. The default music location for iTunes is This PC -> Music -> iTunes -> iTunes Media -> Music. From here, you will need to locate the correct folder based on the artist/album.
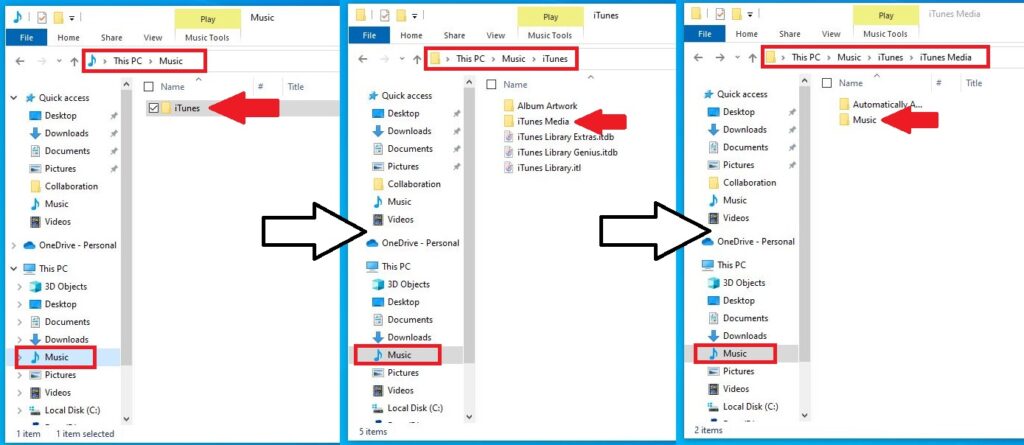
In this example, the AAC file is located in Various Artists -> The Best Retro Video Game Music of All Time.
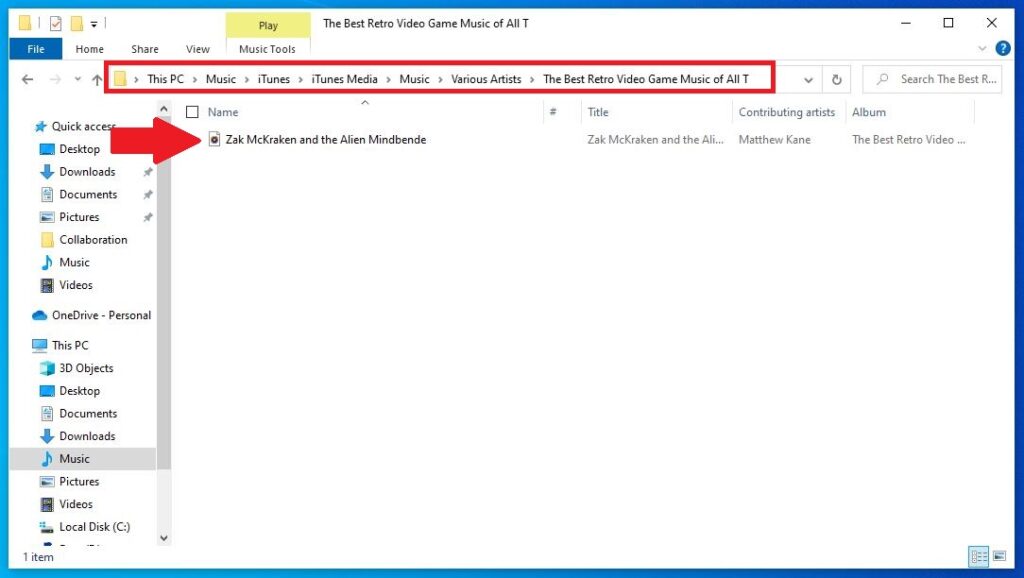
At this point, you may not notice because file extensions are currently hidden, but the file extension on the audio clip is currently .m4a. This needs to be renamed to .m4r. Before this can happen, we need to make sure the file extension is visible.
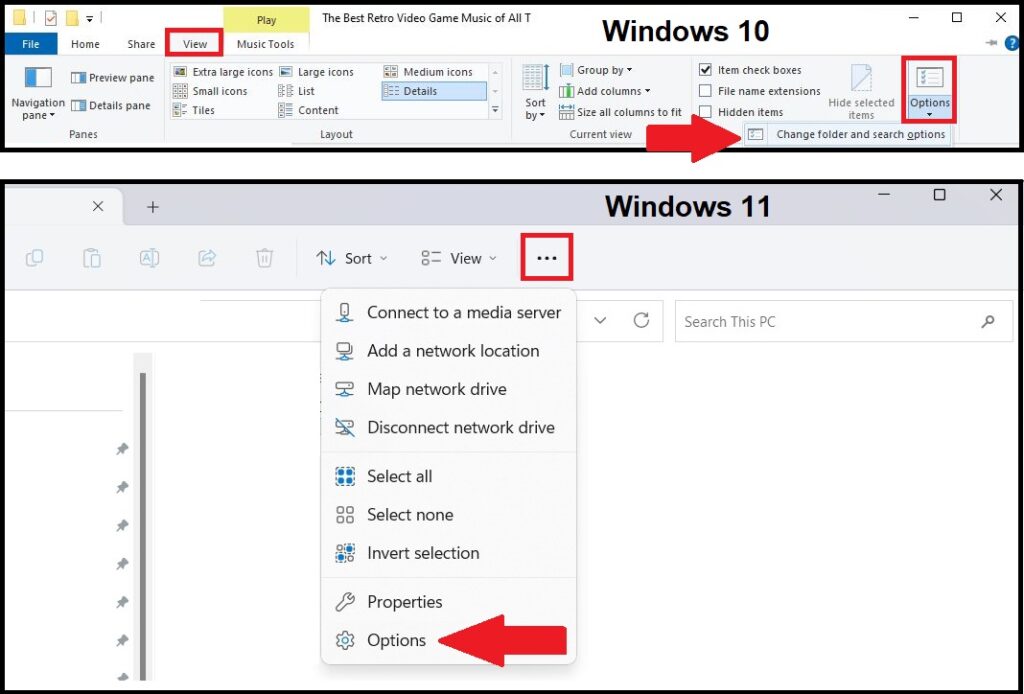
Step 6 – Unhide File Extensions in Windows File Explorer
In Windows 10, click ‘View’ -> ‘Options’ -> ‘Change folder and search options.’
In Windows 11, click the three dots (…) -> ‘Options.’ This is equivalent to the process in Windows 10
“In Folder Options, under the ‘View’ tab, uncheck ‘Hide extensions for known file types,’ and click OK.
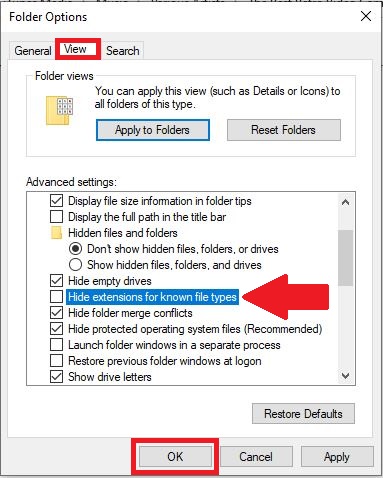
The file extension is now unhidden. Right-click the file, select ‘Rename,’ and change the extension from .m4a to .m4r.

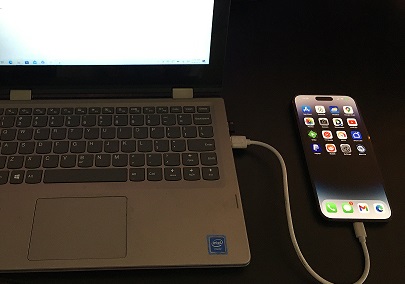
Step 7 – Copy the Ringtone to Your iPhone
Grab a Lightning to USB cable and plug your iPhone into the computer. Click ‘Allow’ on any prompts that pop up, and you may also need to input your passcode.
Switch back to iTunes on your computer (don’t close the File Explorer window). You should now see your iPhone in the left-hand pane. Click on ‘Tones.’
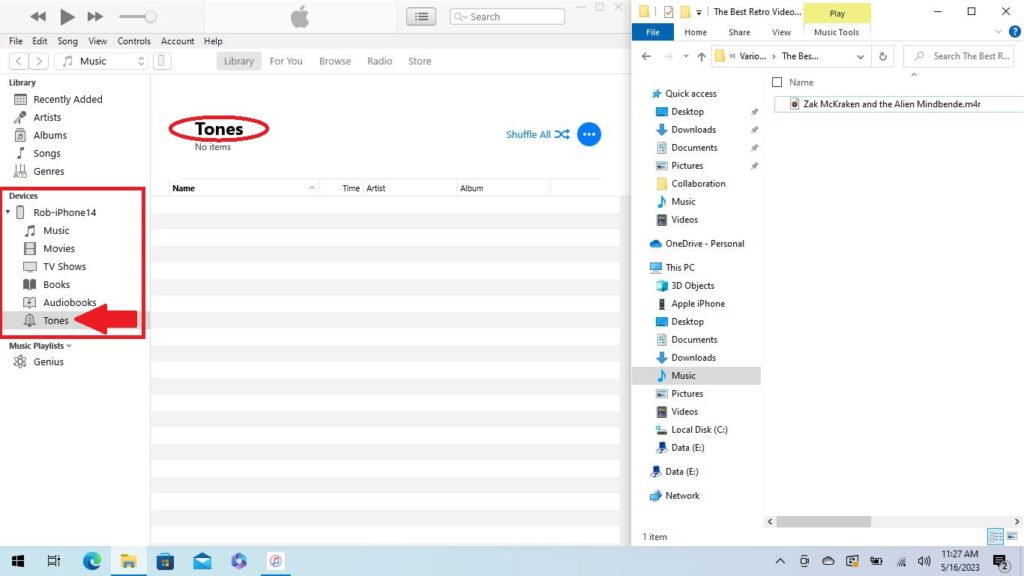
Drag the .m4r file into iTunes under ‘Tones.’
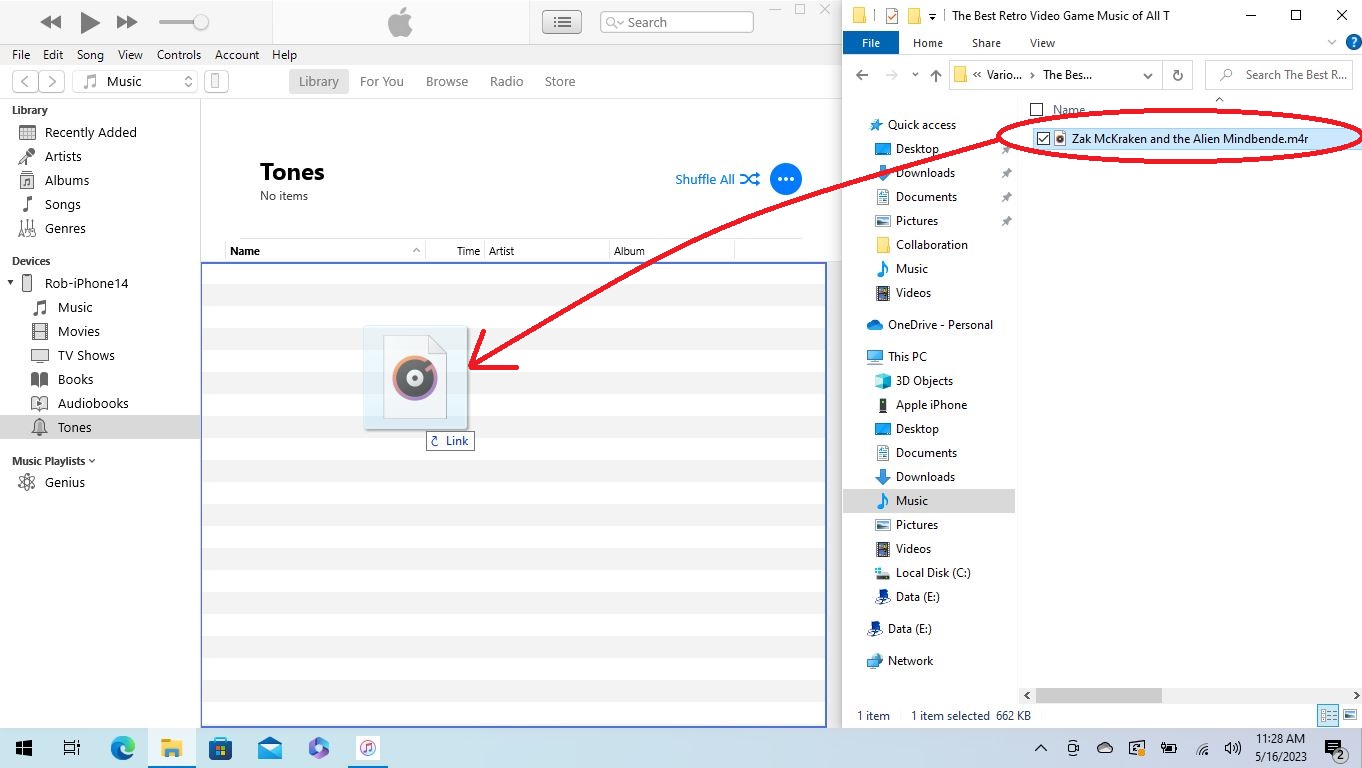
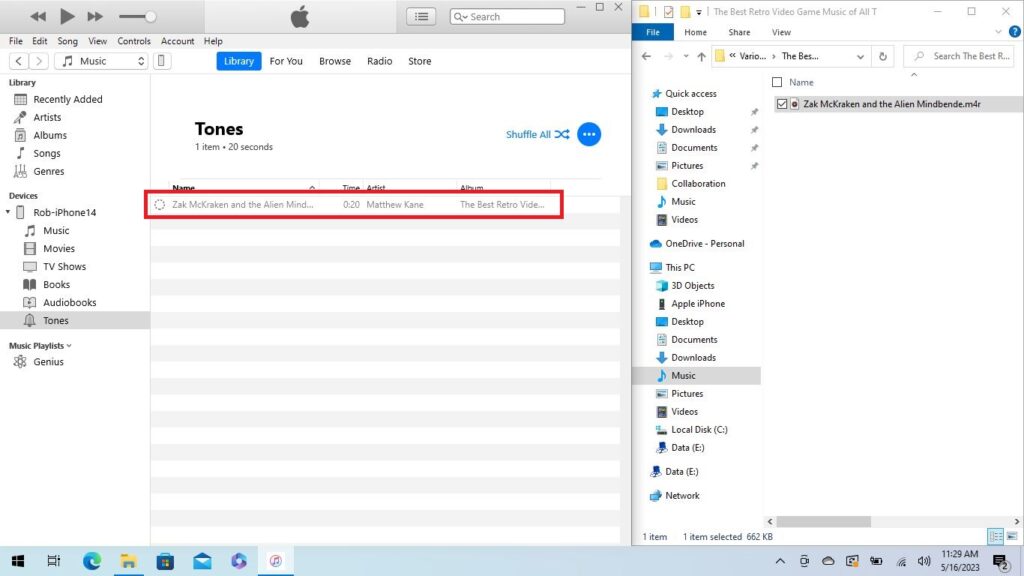
The ringtone has now been successfully added!
Step 8 – Set the Ringtone on Your iPhone
On your iPhone, navigate to Settings -> Sounds & Haptics -> Ringtone. Tap the newly created ringtone, and you’re done!

Did you find this page helpful?
PID: 20230516-00001